How to install UniFi Controller on a Synology NAS using Docker Manager
This article describes how you can easily install a UniFi Controller on your Synology NAS. We will be using the new Container Manager by Synology.
This article describes how you can easily install a UniFi Controller on your Synology NAS. We will be using the new Container Manager by Synology.
Prequisites
- Your Synology NAS must have at least
DSM 7.2or newer installed.
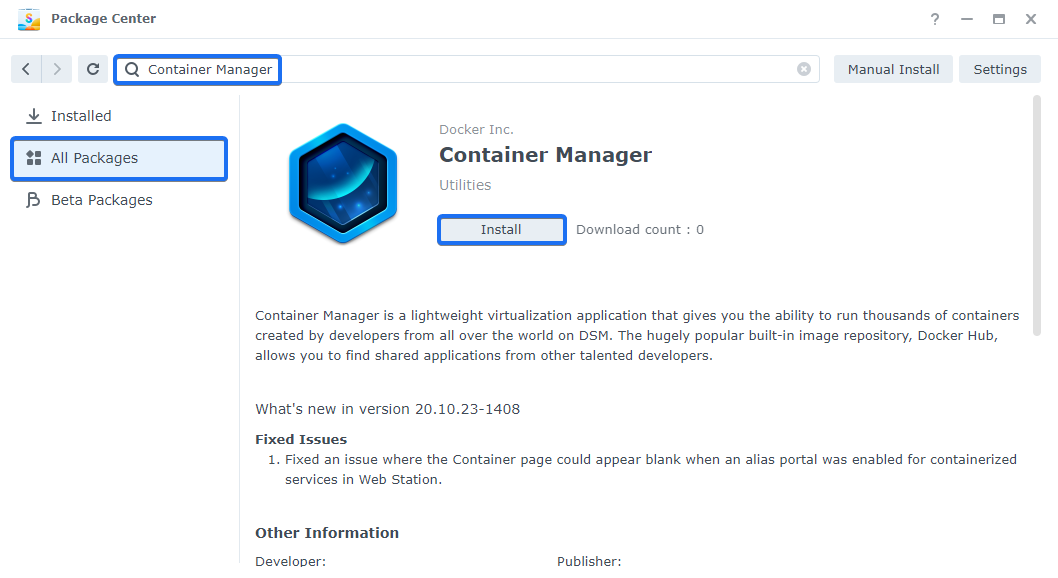
Step 1 - Install Container Manager
The Docker Manager must be installed and ready for use.
Step 2 - Create folder structure
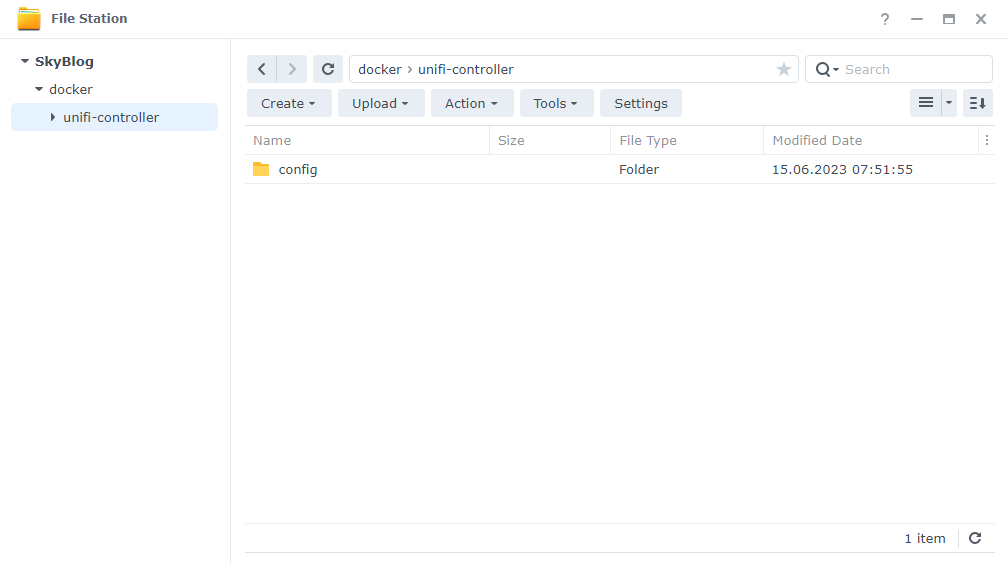
First, we need to create the necessary folders in the shared folder docker.
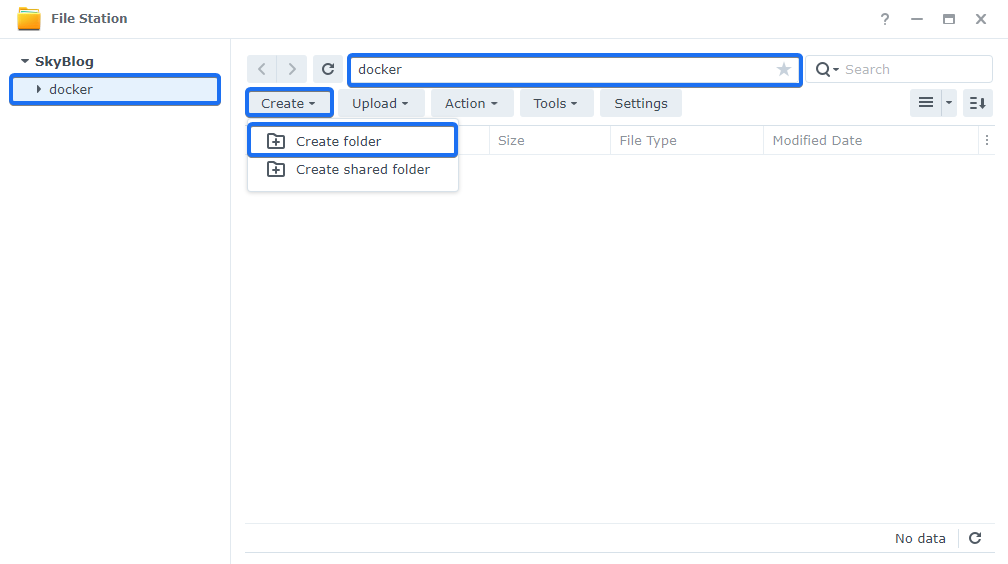
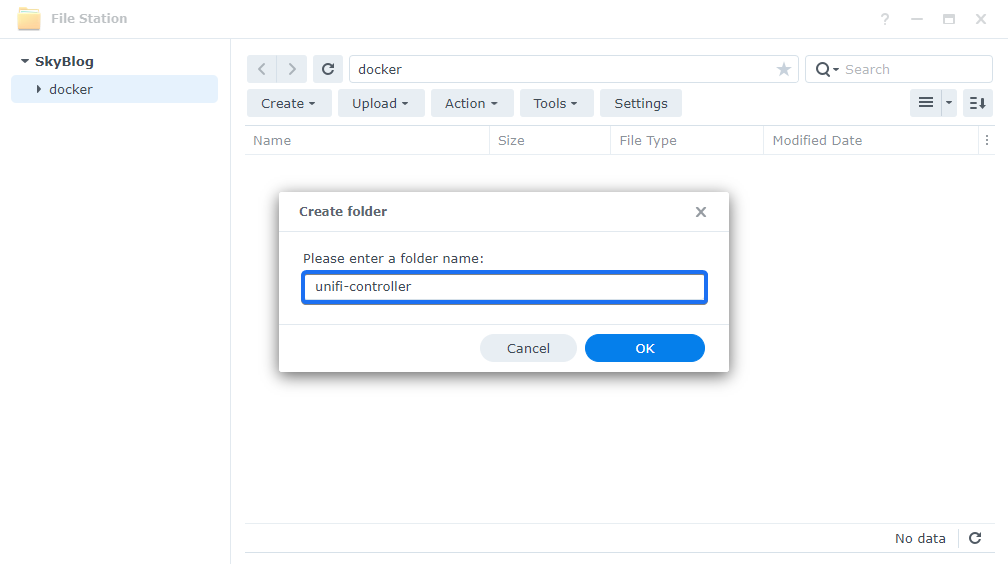
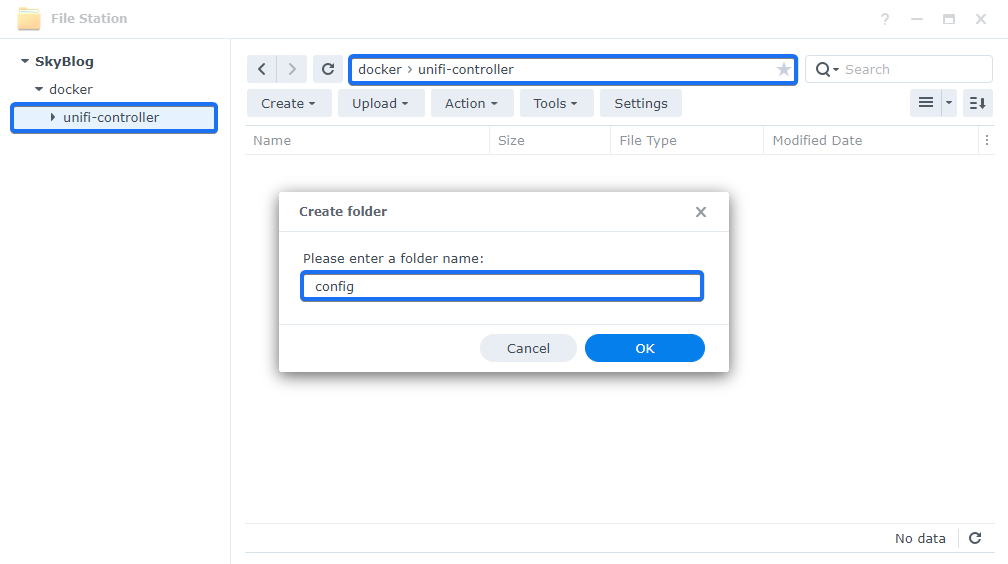
In the end, it should look like this:
Step 3 - Create and configure the container
Now open the Projects tab in the Container Manager and create a project.
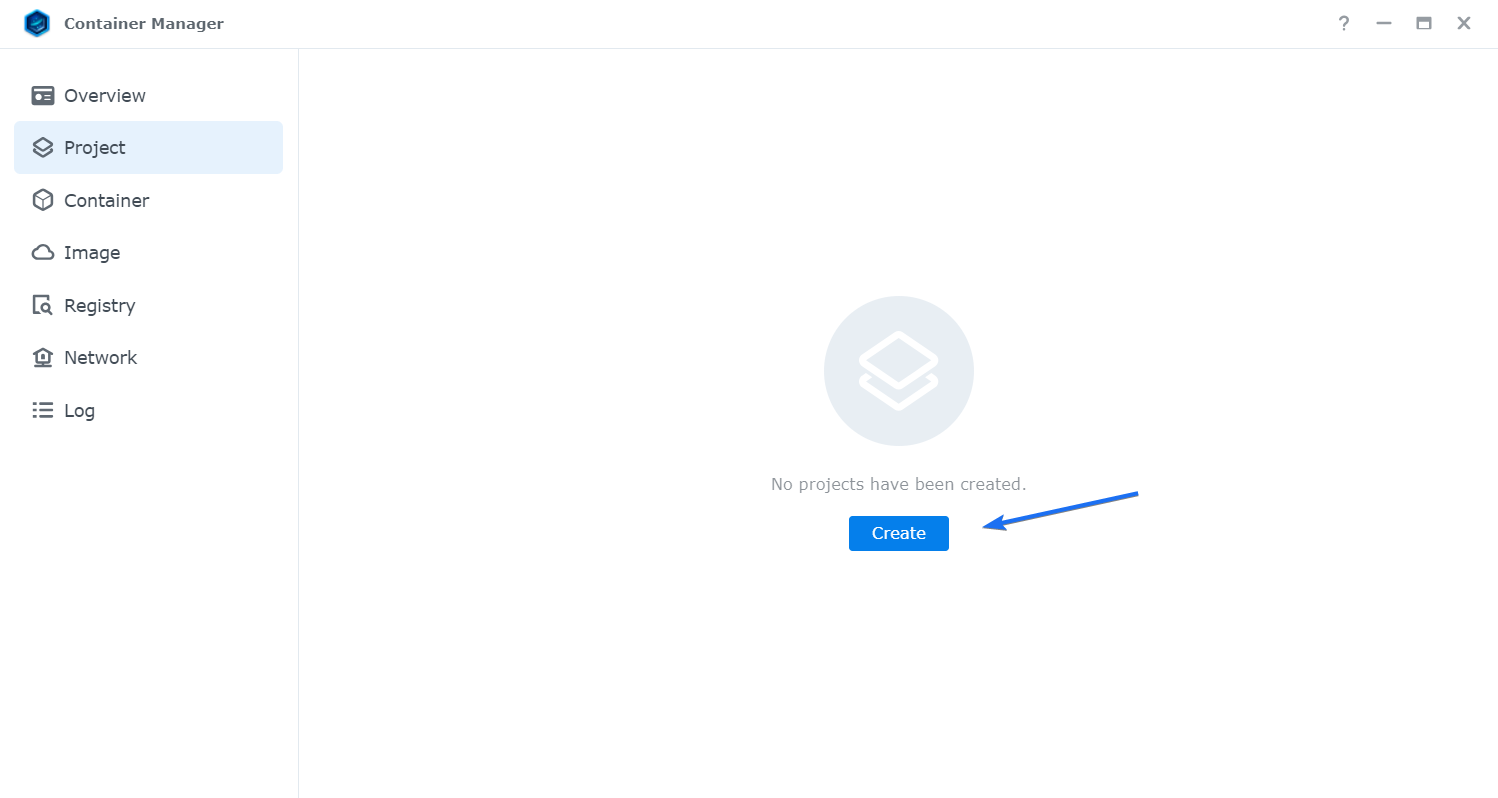
Now adjust the configuration as described in the screenshot.
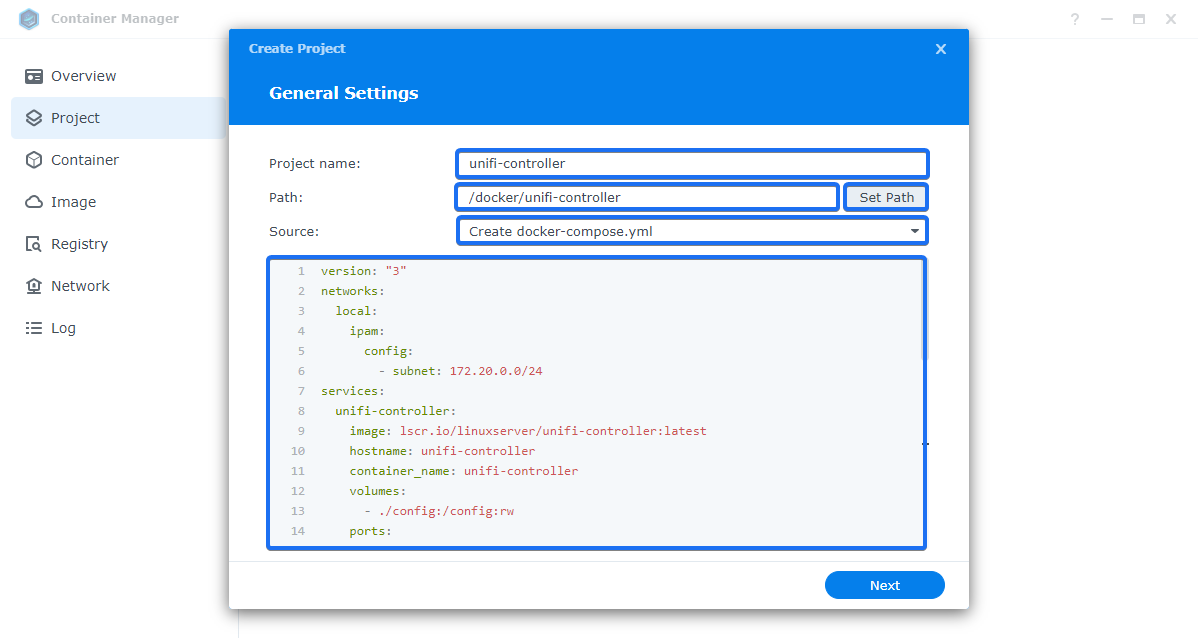
Here is the configuration you can use:
version: "3"
networks:
  local:
    ipam:
      config:
        - subnet: 172.20.0.0/24
services:
  unifi-controller:
    image: lscr.io/linuxserver/unifi-controller:latest
    hostname: unifi-controller
    container_name: unifi-controller
    volumes:
      - ./config:/config:rw
    ports:
      - "3478:3478/udp"
      - "10001:10001/udp"
      - "8080:8080/tcp"
      - "8443:8443/tcp"
    environment:
      - PUID=1000
      - PGID=1000
      - TZ=Zurich
    restart: unless-stopped
    networks:
      local:
        ipv4_address: 172.20.0.2
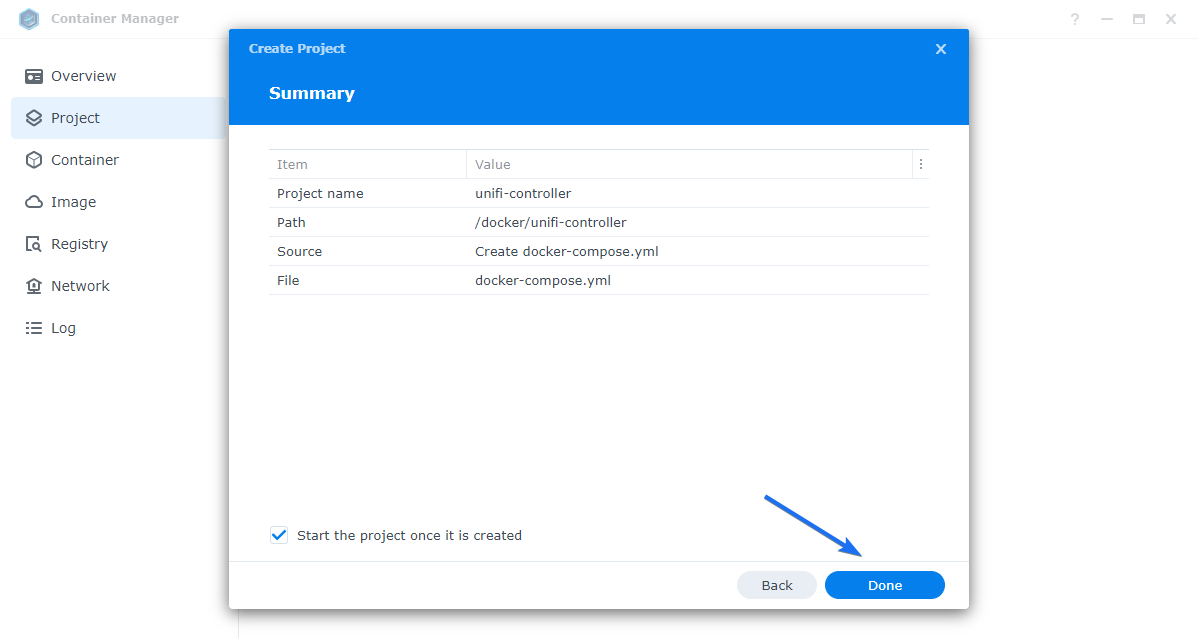
Next, you will be asked if you want to connect everything through the web portal via Web Station. Simply click Next.
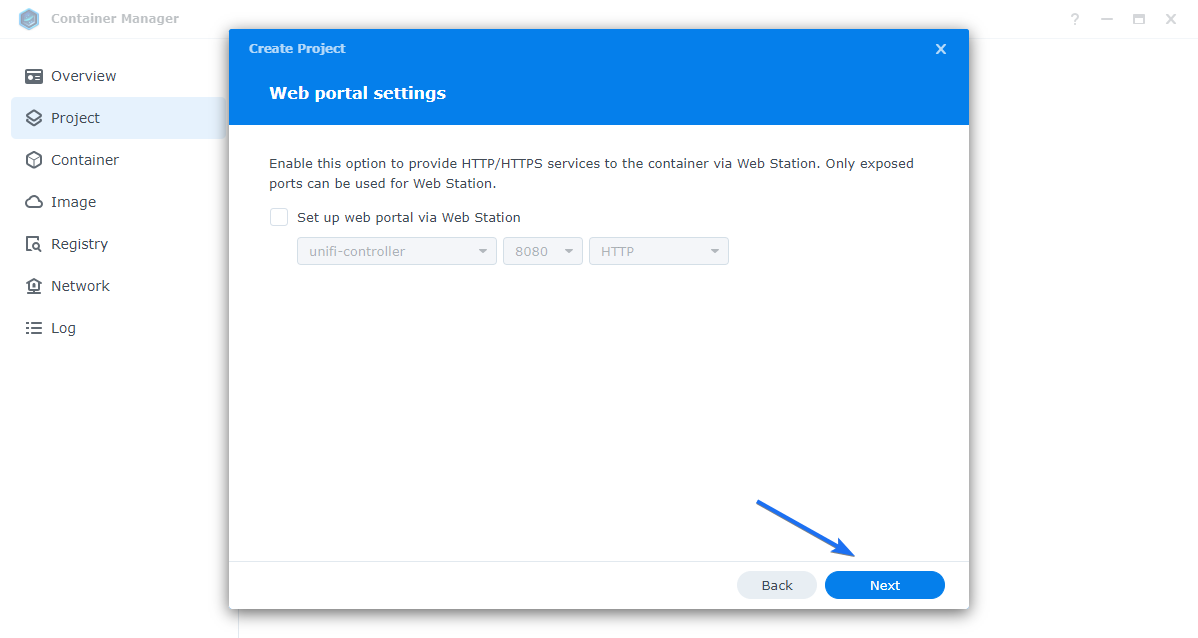
Finally, click on Done. The Docker image will now be downloaded, and the configuration will be installed.
Step 4 - Access the website
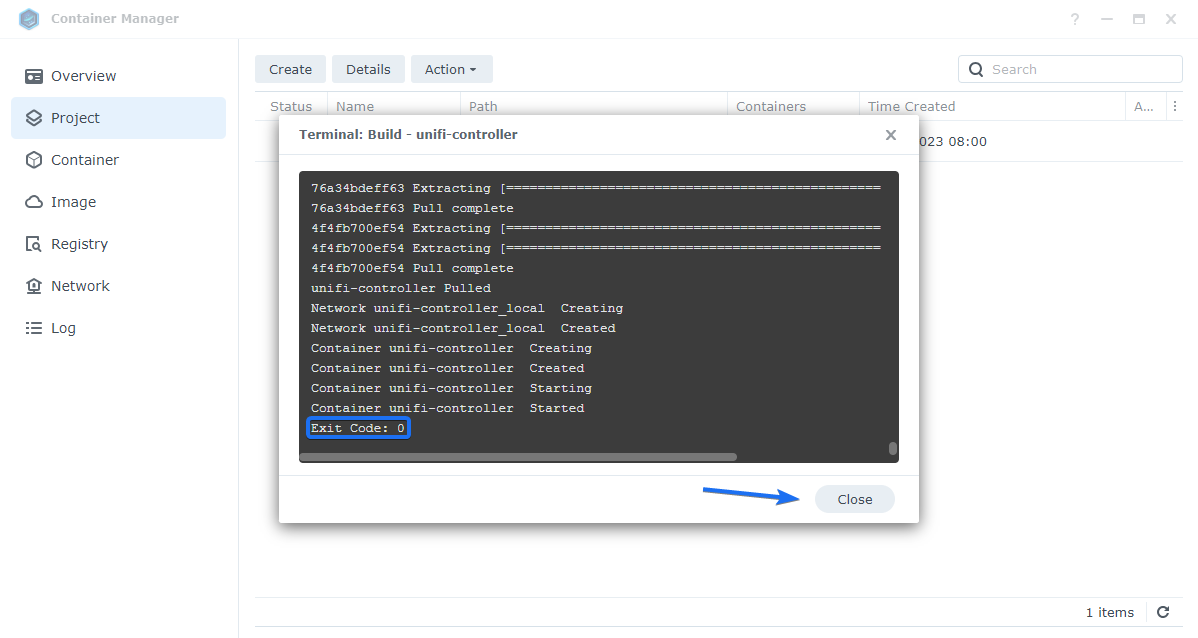
If everything has been successful, you should see an Exit Code: 0 at the end..
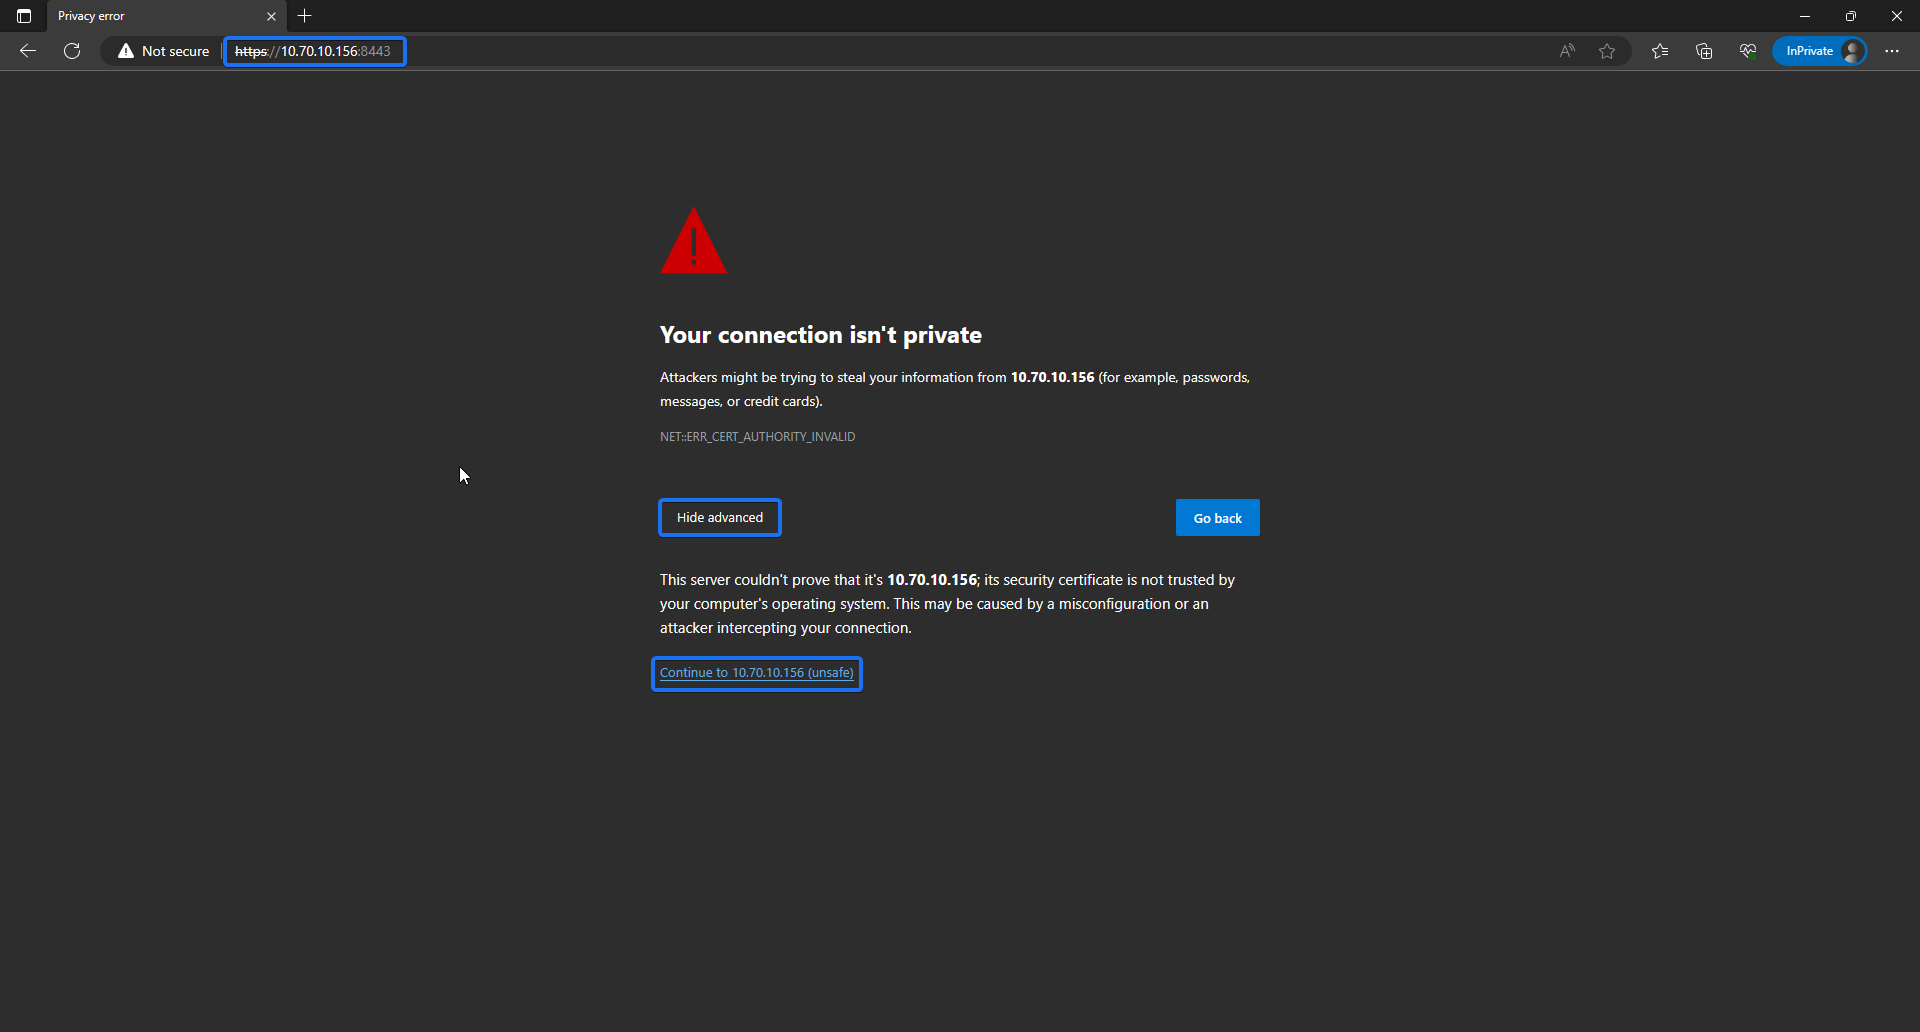
Now you can access the web interface of the UniFi Controller by using the IP address of your NAS combined with https and port 8443. An example would be https://192.168.1.25:8443 or https://yourNAS:8443.
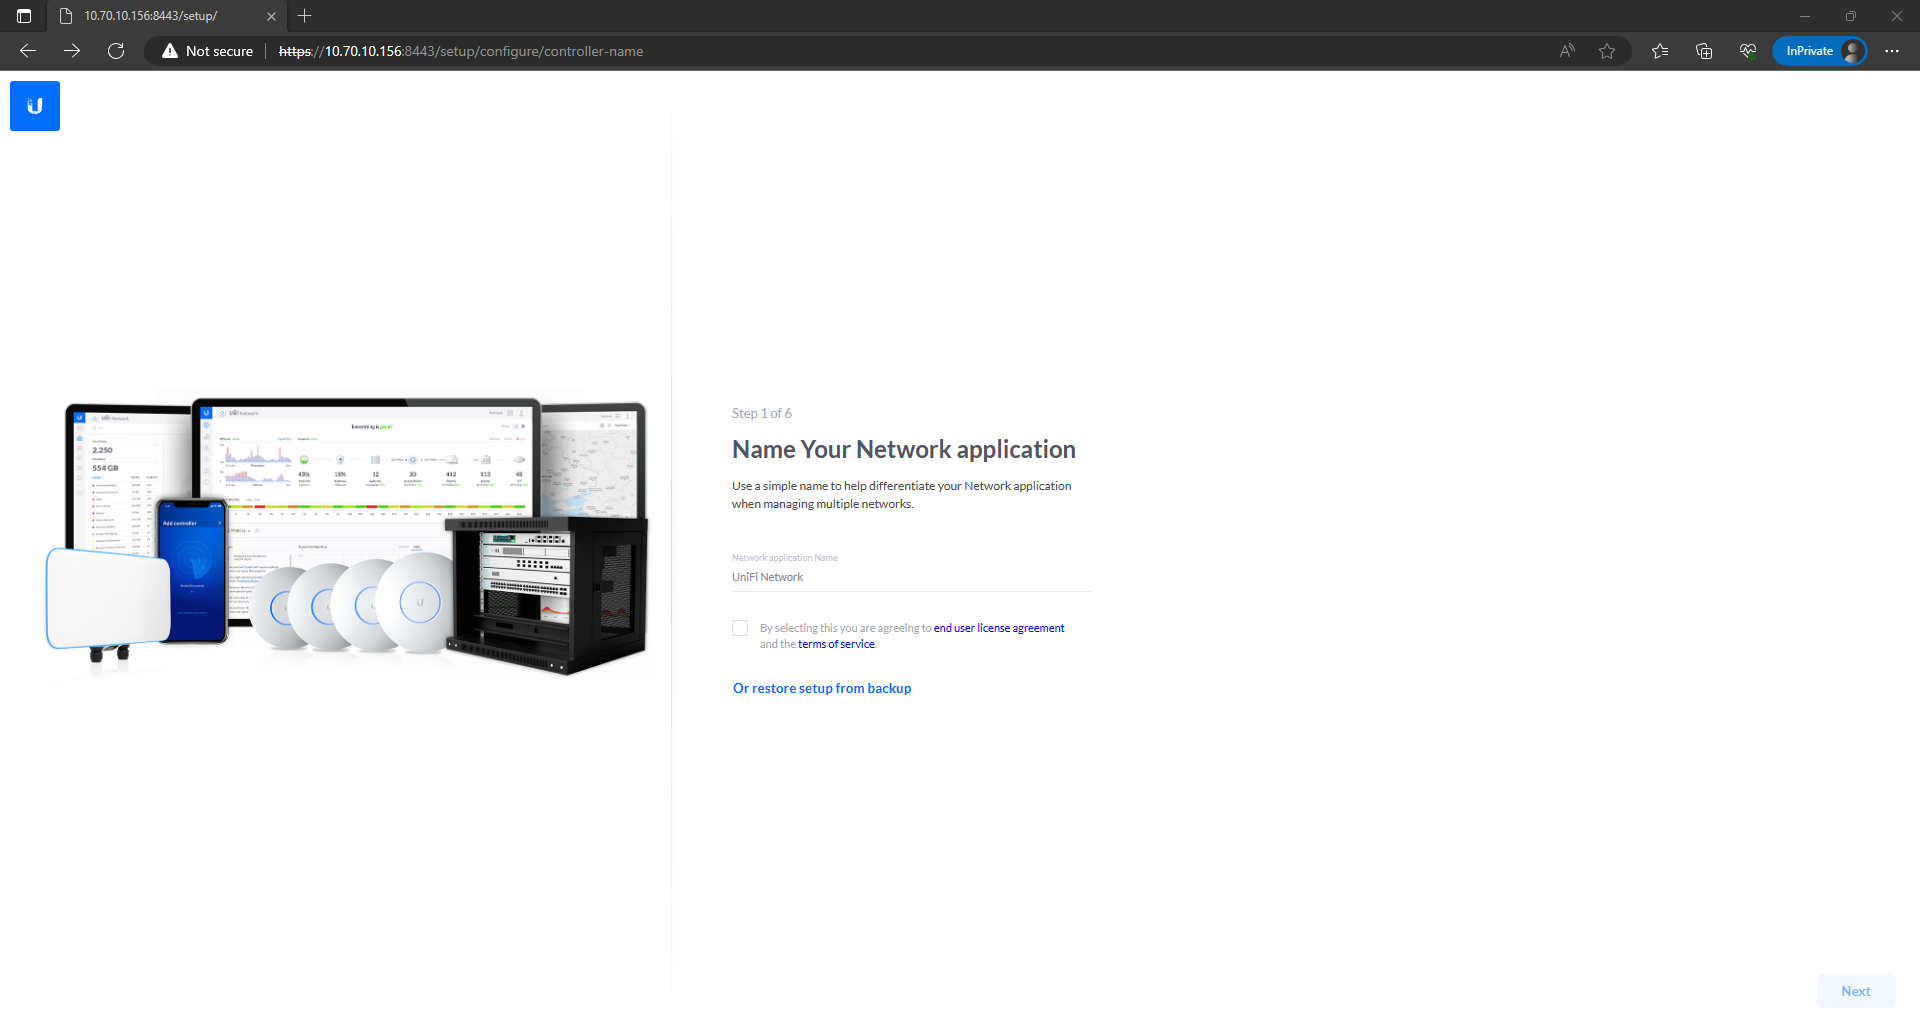
Now you can start the setup of the UniFi Controller.
Troubleshooting
If you encounter any issues during the setup, here are a few points where you might have made a mistake.
- Error when mounting the data into the correct folder.
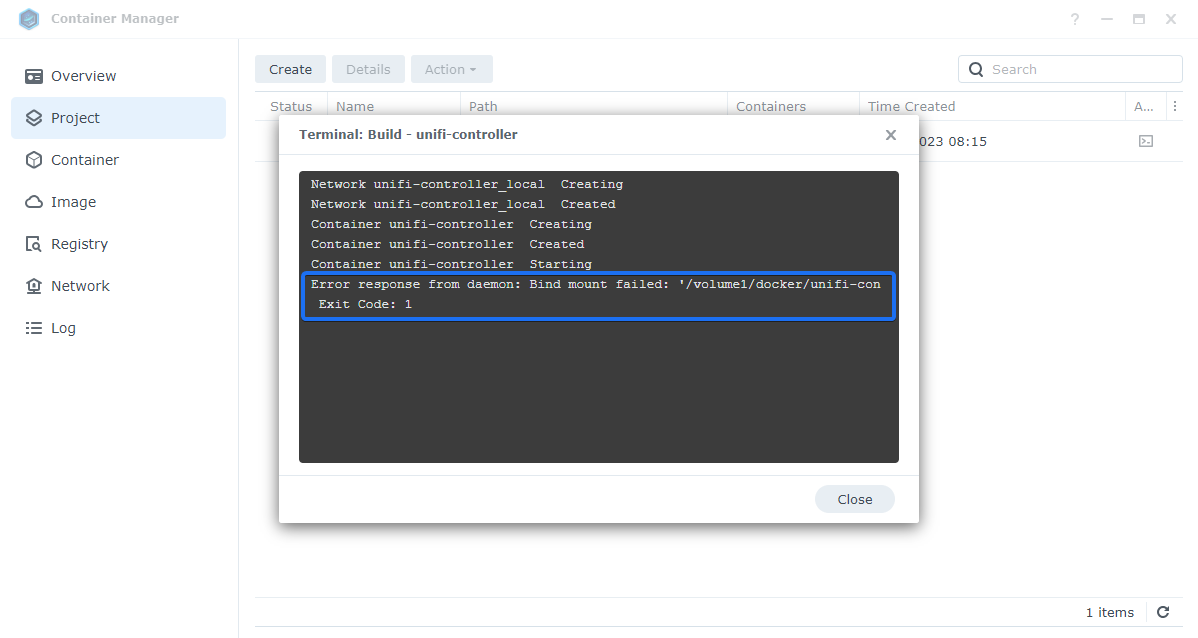
In case of this error, the configuration data of the Docker image cannot be written to the NAS. The most common reason is that a specific folder does not exist. Make sure to follow the exact steps of the guide. The files should be located at /docker/unifi-controller/config, and when creating the project, the path must be /docker/unifi-controller. It is important that all folders already exist.
- Error when accessing the UniFi interface.
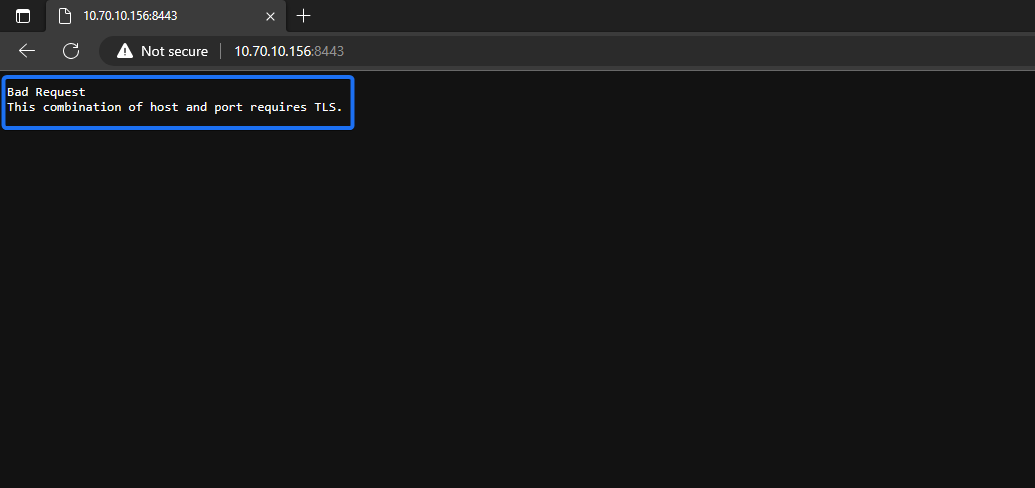
If this error occurs, it means that the connection is established via HTTP instead of HTTPS. Please make sure that you are accessing the URL with HTTPS://.
Finally
You have now learned how to install the UniFi Controller on a Synology NAS. If you need further help despite the instructions, you can join our Discord Server or ask a question in the chat section below. If you like our articles, you are welcome to support this project with a membership or a one-time donation.


Discussion